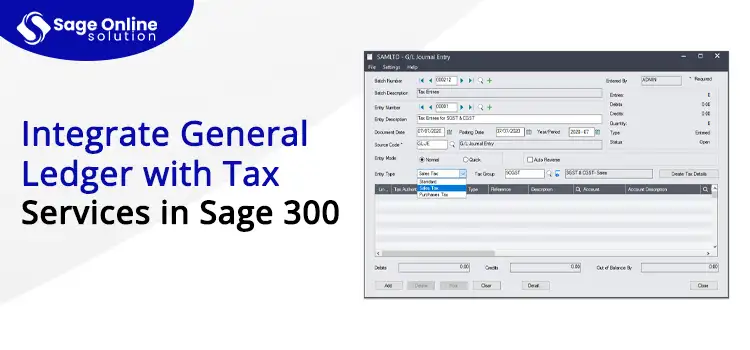
The Sage 300 is an excellent fit for any business enterprise, offering various solutions through which they can easily automatize their working processes. Based on the basic working structure of any business enterprise, the Sage 300 offers various suites with financial, operational, payroll, and other core options. While the major need of any business software is to manage its finances, the crucial component that any business application should have is the General Ledger Integration and Tax management options. While both of these are must-have components, a major function is how you can use these together.
Here, we will tell you how you can integrate Tax services with General Ledger for Taxes and other related information. Along with that, we will list some of the best features of the Sage 300 which users can easily utilize to automate their daily operations. Stick to this narrative till the end to get more details on the Sage 300 application and General Ledger Integration with Tax Services.
General Ledger Accounting Services in Sage 300
By definition or in general terms, a general ledger is simply a database or repository that keeps the data of all the financial transactions made in a company. In the General Ledger, a company can track all the financial records or transactions like sales, purchases, payments, and other receipts related to various transactions made by the company. Some of the basic features of the General Ledger involve account process automation, financial & transactional reporting, and the management of the chart of accounts. While these are basic features that need to be mandatorily present in any business software, General Ledger also offers some additional features that can be essential for any business enterprise to handle their processes. These include:
- Real-Time Reporting
- Vendor Management
- Invoice Generation and Capture
- Automation in the Workflow
- Easy General Ledger integration with other components like Tax services and others.
How to Setup/Install General Ledger in Sage 300
The first thing to know before getting information about General Ledger Integration in Sage 300 is to how you can setup General Ledger in Sage 300. Users need to set up General Ledger in their Sage 300 applications through which they can easily determine how G/L can interact with various modules of the Sage 300. Along with that, through General Ledger setup, users can easily set up accounts, different options, and security authorization related to it in their Sage 300. You can also contact our expert on Sage Accounting Phone Number, who are available to help our users at any point of time.
Setting up a General Ledger Accounting Services is a Simple and Stepwise Process Discussed Below:
Activation of General Ledger for the Database
The first step is to set up various database tables required by the General Ledger application. For this, navigate to the Administrative Service Folder and then Hit the Data Activation icon on the screen. Activation of the General Ledger will require the information related to the current Fiscal Year and the starting date of the oldest fiscal year data, which you need to keep in your General Ledger Account.
Configuration and Processing
Afterward, you need to select various options you need to include in your General Ledger account. These can be sample charts of accounts, account groups, what account segments can be used and how many, whether or not print batches or allow posting to the previous years. Therefore, to configure your General Ledger Account and select various options, you need to utilize the following G/L screens:
- G/L Options Screens to select all the options that you are going to use in your General Ledger Account.
- Segments Codes and Account Structure Codes for the chart of accounts.
- Journal Profile Screens to sort and print details related to various posted transactions.
- Account Group Screen
- The remaining icons are for reevaluation codes, recurring entries, and various fields.
Add General Ledger Account and Historical Data
Lastly in order to install General Ledger in Sage 300, you need to add various accounts. Afterward, you have to enter the year-to-date balances of each of your General Ledger Accounts.
Tax Services in Sage 300
The next major thing to discuss under General Ledger Integration is the Tax Services. Through the Tax services amenity in the Sage 300, users can easily manage taxes laid due to the sales and purchases made by the company. It is easy for users to report tax information through tax services. To utilize this option, you need to set up Tax Service in your Sage 300. Activating tax services can be necessary for the user as various accounting programs sometimes require sales tax data.
- Tax Service setup is a simple step-wise process where user needs to create tables to store Tax Data. Given below is the stepwise representation of how you can set up tax services in your Sage 300.
- First of all, you need to gather all the current tax records related to your company. These include sales tax account, tax liability, tax expense account, and recoverable tax. This will also include various sales areas along with their associated tax authorities.
- After that, you need to select the general ledger account associated with your Tax Data. This will primarily include:
- Tax Liability
- Recoverable Tax
- Expense
- Following that, you need to add tax authorities. Also, add tax classes for various Tax authorities.
- Provide other tax-related information like tax rates for various sets of sales and purchases.
- Include various tax groups.
Once the activation is completed, the Tax Services icon is added to the common service folder.
Add Tax Authorities and Tax Classes
Follow the given steps below in order to add Tax Authorities and Tax classes in Sage 300:
Add/Edit Tax Authorities
- On Sage 300, navigate and select the option Common Services. From the drop-down, hit the option Tax Services and then Tax Authorities.
- Afterward, you need to enter the 12-digit alphanumeric code along with the description of the new authority.
- Provide the given details:
- Tax reporting currency
- Maximum tax Allowable
- No tax is charged below
- Tax Base, report level,
- Choose the option “Allow Tax in Price.”
- Choose the accounts and then hit “Add” or “Save” to confirm the given changes.
To delete the Tax authorities, you need to follow the given path:
- Common Services/Tax Services/Tax Authorities.
- Select the code or the Tax authority you wish to delete.
- Hit on Delete.
Add/Edit Tax Class
Different tax classes that can be added to a Tax Authority include Sales Items, Customers, Vendors, Purchase Items, and many others. Before adding Tax Classes, it is mandatory that you add Tax Authority. Afterwards, you can follow the given steps:
- Locate the option Common Services and then hit the options Tax Services and then Tax Classes.
- To add Tax classes, you must need to add Tax authority code, Transaction Type, and then Class Type.
- Provide the description of the Tax Class.
- In order to add further Tax Classes, you need to hit either “Tab” or “Enter.”
- Afterward, hit Add or Save to approve the changes made.
Tax Classes can be added and deleted easily by the user through the option “Common Services” followed by “Tax Services” and then “Tax Class.” Select the Tax Class you wish to delete. With all the details being discussed, you can now easily add Tax Services to your Sage 300 Applications.
General Ledger Integration with Tax Services in Sage 300
The Sage 300 Cloud offers its users the ability to integrate tax services, through which users can easily enter tax amounts in general ledger journal entries. Once you have set the General Ledger Accounting services and the Tax Amount for various sales and purchases, you can easily add them to Journal Entries while creating them. Users also have the option to add tax amounts in the Journal Entry while creating them, or they can add them later. However, you need to set up tax amounts relating to the sales or purchases. This will include adding Tax Authorities and other Tax services all of which have been discussed in the section above.
Add a Journal Entry
- Launch Sage 300, where you need to open General Ledger followed by G/L Transactions and then Journal Entry.
- On the top right corner of the screen, you can easily locate the “Create New Batch” button.
- The batch number will be automatically generated by the General Ledger. All you need to do is fill out the batch description field.
- Afterwards, you need to fill out the information in the following header:
- Description of the entry.
- Journal Entry dates, i.e., Documents Dates and posting dates.
- Fiscal year along with the period to post the transactions.
- Source code for the transaction, which can be fetched from the Posting Tab of the General Ledger. However, users also have the option to change the code.
- Entry mode, i.e., Normal or Quick
- Use the auto Reverse option in case you wish to reverse the transaction.
- Following this, you need to provide Credit and Debit information in the details table.
- You can also add optional details for each of the details you have filled out earlier. For this, you need to navigate to the optional field section. There, hit the finder button, after which you can make a selection from various optional fields. However, only the defined optional transactional field can be added. Users also have the option to delete the optional field.
- Once you have provided the required details, you need to hit on “Save” button.
Add Tax Amount Details in General Ledger Journal Entry
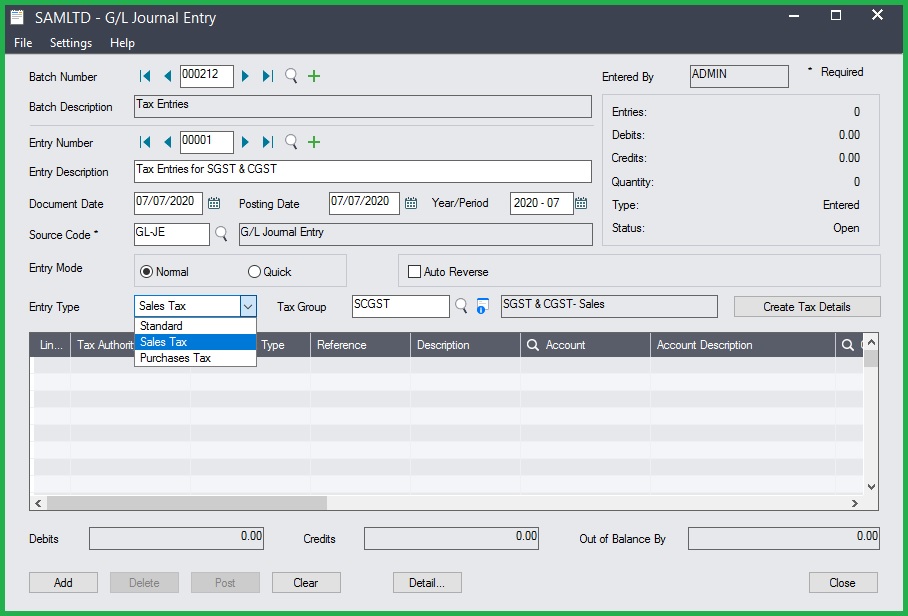
While Adding the Journal Entry, you can easily add the Tax amount. However, you can also add tax amounts later. Follow the steps below to know more about General Ledger Integration with Tax Services in Sage 300:
- First, open the Journal Entry. For that, go to the General Ledger, select G/L transaction, and then Journal Entry.
- In the Journal Entry, under the entry type, you can easily find the option to select the Tax Amount you wish to add for the given sales and purchase.
- Select the Transaction type followed by the Tax Group to make the entry. Tax Group can be located in the finder. However, only the ones created in the services will be available in the finder.
- Along with the Tax Amount, users have the option to provide other relevant and optional details like Vendor Number and reference document number.
- After the selection of the Tax group, you need to hit the option “Create Tax Details.” Based on this, the system will create the details regarding the transaction related to the tax, i.e., either a Sales Tax or a Purchase, and also define the Tax Authority in each tax group.
- Select the Tax Account Type, which by default is “Liability” in the case of Sales Tax. For the purchase, it can be expensed, recoverable, and allocated.
- Lastly, provide the General Ledger account details for Tax Authority, Tax Amount, and other crucial details required.
Whatever amount you have entered in the General Ledger account will be automatically displayed in the Tax Account Details.
Making it Short and Simple
The Sage 300 is an excellent option for large-scale business to manage their finances and other operation-related tasks. Major components for any business that can easily Automates General Ledger and Tax Services. Moreover, Sage 300 offers the option through which you can easily add Tax Amount details in any General Ledger Journal Entry. While it can be easy and simple to add a Journal and include other tax amount details, you can connect with Sage Online for any assistance regarding any issue you are facing with Sage 300, Sage 50 or any other version of Sage.

